How to Assemble a SAVA Di2 Carbon Fiber Road Bike?
In order to provide more convenience to riders, 90% of SAVA bicycles are pre-installed before customers receive them. The rest only needs to install wheels, handlebars, seat tubes and pedals. This is very useful for novices. is very friendly, but some customers feel that assembling a SAVA Di2 carbon fiber road bike may seem like a daunting task, but with the right tools and instructions, it can be a straightforward process. Whether you are a seasoned cyclist or a beginner, this guide will walk you through the steps to assemble your SAVA Di2 Carbon Fiber Road Bike.There is an installation video here:How to install Di2 bikes?

Step 1: Unboxing and Inspection
Start by carefully unboxing your SAVA Di2 Carbon Fiber Road Bike. Inspect all the components to ensure that everything is in good condition and there are no visible damages. Check for any loose parts or accessories that may have come loose during shipping.


What’s in the Package?
An accessory box, a bicycle front wheel box, and a complete bike
The accessories box contains: hex wrench*1, seat tube clamp*1, cable link tool*1, Di2 charging cable*1, reflector*2,pedals*1pair etc.

Step 2: Wheel Installation
Take out the front fork protective cover and brake protective pad, and install the front wheel to the frame. Place the wheel into the dropout and make sure it is properly aligned. Insert the thru-axle rod through the disc, turn the lever clockwise until it is secure, and tighten the thru-axle rod.

Step 3: Seatpost and Saddle Installation
Take out the two wires from the seat tube and straighten them up. You will find a long wire and a short wire. The long wire is connected to the rear dial. Insert the long wire into the copper plate interface of the seat post. A short wire can be inserted into the other two holes, and then inserted into the seat tube. Remember to put in the seat tube first and then the seat tube clamp to prevent the seat tube clamp from falling into the frame.

Step 4:Handlebar and Stem Installation
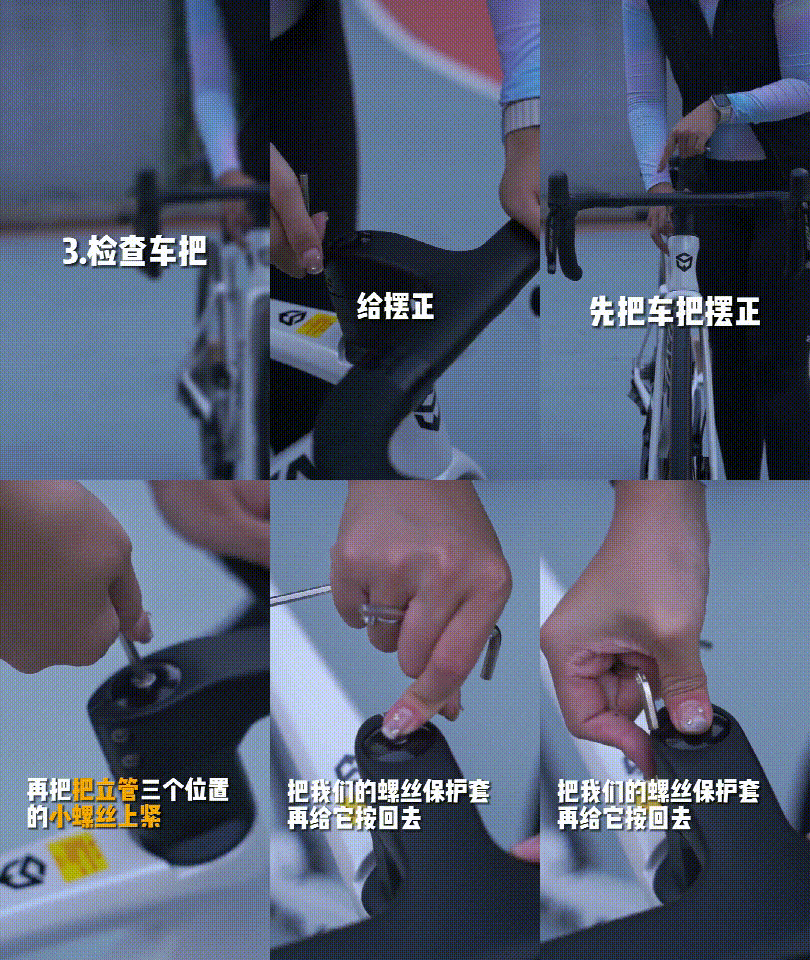
Begin by installing the handlebar and stem. Align the stem with the front fork and tighten the bolts using an Allen wrench. Make sure the handlebar is straight and at a comfortable height and angle for your riding style.
Step 5: Pedal Installation
Be careful to align the threads when installing the pedal to avoid damage to the crank threads due to incorrect operation.


Lascia un commento